Tag: cooking

  • Simple and Savory Chicken Salad Sandwich

    Simple and Savory Chicken Salad Sandwich

    Total Time 30 minutes
    Servings: 3
    Course: Main Course

    Ingredients
      

    For the Chicken:
    • 3 chicken breast tenders Trader Joe’s recommended
    • 2 tsp onion powder
    • 1-2 tsp coarse salt or enough to flavor the water.
    • 2-3 bay leaves
    • 2 cups water
    For the Salad Dressing:
    • 5 tbsp mayonnaise
    • 1 tsp mustard
    • ½ tsp lemon juice
    • tsp celery seed
    • tsp salt
    • ¼ tsp black pepper
    • ¼ tsp onion powder
    Additional Ingredients:
    • celery stalks finely diced
    For the Sandwich:
    • 1 large tomato thinly sliced
    • Lettuce leaves
    • Potato bread burger buns

    Method
     

    Cook the Chicken
    1. In a pot, bring 2 cups of water to a boil. Add the onion powder, salt, and bay leaves. Carefully place the chicken tenders into the boiling water and cook for about 15 minutes, or until the internal temperature reaches 165°F.
    Shred and Cool
    1. Remove the chicken from the water and shred it using a fork. Place the shredded chicken in the fridge for about 10 minutes to cool.
    Prepare the Salad Dressing
    1. In a bowl, combine the mayonnaise, mustard, lemon juice, celery seed, salt, black pepper, and onion powder. Mix until smooth and well combined. Add the diced celery and stir to incorporate.
    Mix the Chicken Salad
    1. Remove the cooled chicken from the fridge and add it to the dressing. Mix well to ensure the chicken is evenly coated. Return the chicken salad to the fridge for another 10 minutes to allow the flavors to meld.
    Prepare Sandwich Ingredients
    1. While waiting, slice the tomato and wash the lettuce. Lightly toast the potato bread buns in a pan until golden and slightly crispy.
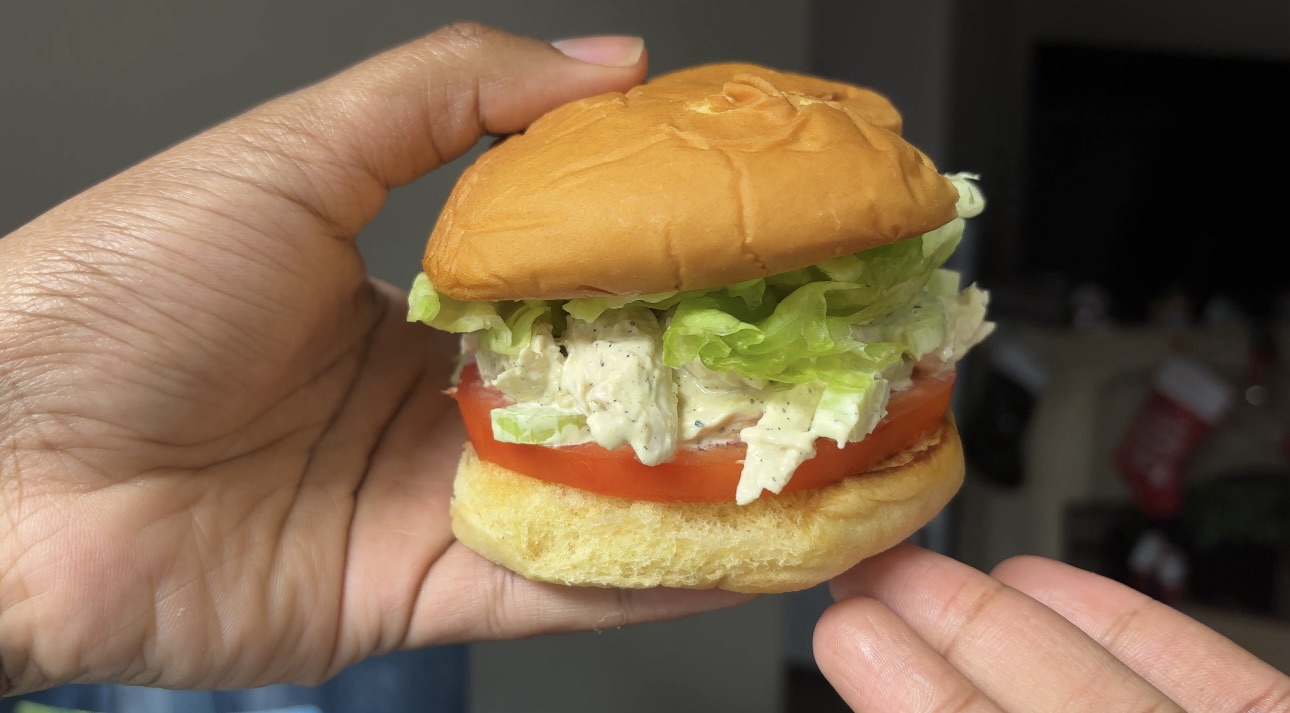
    Assemble the Sandwich
    1. Layer the sandwich with a slice of tomato, a generous scoop of chicken salad, and a leaf of lettuce. Top with the other half of the bun, and your sandwich is ready to serve!

    Notes

    So easy and tasty!
    I would seriously recommend trying this!! It’s one of my favorite recipes and always fills me up when I want something quick to eat. Plus you can make more of the chicken salad and store it in the fridge for later.

  • Perfectly Soft Sushi Rice Recipe

    Perfectly Soft Sushi Rice Recipe

    Sushi rice, known for its soft and bouncy texture, is a versatile staple that absorbs flavors beautifully. This recipe is inspired by traditional Korean household methods, adjusted for using sushi rice instead of jasmine rice. Follow these steps to achieve perfectly cooked sushi rice every time!
    Prep Time 30 minutes
    Cook Time 20 minutes
    resting time 5 minutes
    Total Time 55 minutes
    Servings: 3
    Course: Side Dish

    Ingredients
      

    • 2 cups medium-grain sushi rice e.g., Kyong Gi Me
    • 2 cups cold water or enough to reach the first line on your index finger when measured in the rice cooker

    Equipment

    • Rice cooker
    • Bowl for washing the rice

    Method
     

    Step 1: Wash the Rice
    1. Measure 2 cups of sushi rice and place it in a bowl.
    2. Rinse the rice thoroughly by swirling it with your hands in cold water. Pour out the cloudy water and repeat the process until the water runs clear. This removes excess starch and prevents clumping during cooking.
    Step 2: Prepare the Rice for Cooking
    1. Transfer the washed rice into the rice cooker pot.
    2. Add 2 cups of cold water (or enough water to reach the first line on your index finger when the tip touches the rice).
    3. Important: Allow the rice to sit in the cold water for exactly 30 minutes. This soaking step is crucial for the rice’s texture, ensuring it becomes soft and bouncy without turning soggy.
    Step 3: Cook the Rice
    1. After soaking, turn on the rice cooker and let it cook fully. Avoid opening the lid during this process to retain steam.
    Step 4: Rest and Fluff
    1. Once the rice is cooked, gently fluff it with a rice paddle or fork to release excess steam and ensure even texture.
    2. Allow the rice to sit for another 5-10 minutes in the rice cooker before serving. This resting time helps the grains settle and enhances the overall texture.
    Serving Suggestions
    1. Pair this perfectly cooked sushi rice with your favorite proteins, vegetables, or sauces.
    2. I paired this with grilled pork belly and oh my!!! It was amazing.

    Notes

    -Using cold water is essential for achieving the right texture—warm water can result in uneven cooking.
    -Do not skip the 30-minute soaking step, as it allows the rice to absorb water evenly before cooking.
    -Store leftover rice in an airtight container and reheat with a damp paper towel to retain its softness.
  • Easy Personal-Sized Cottage Pie Recipe

    Easy Personal Sized Cottage Pie Recipe

    The other day, while binge-watching “And Just Like That,” I caught sight of a character savoring a delicious Cottage Pie that looked so warm and inviting—it instantly ignited a craving in me for something just like that! There’s something about a personal-sized Cottage Pie that wraps you in a cozy embrace, making your whole body feel nourished and satisfied. After some careful tweaks and testing, I crafted the ultimate recipe for the easiest and most delightful Cottage Pie for 1-2. If you’re in the mood to spoil yourself with a heartwarming meal while enjoying your favorite show, or if you want to whip up something special for a dear friend, this Cottage Pie recipe is the perfect choice!
    Prep Time 20 minutes
    Cook Time 35 minutes
    Total Time 55 minutes
    Servings: 1
    Course: Main Course

    Ingredients
      

    • 0.35 Pounds Ground Beef
    • 3 tbsp red wine
    • 3 tbsp veggie stock
    • 1 tsp tomato paste
    • 1 tsp flour
    • 27 grams brunoised chopped veggies carrots, white onions, and celery
    • 1 tsp minced garlic
    • 25 grams corn frozen
    • 25 grams peas frozen
    • 0.3 pounds/ 2 small potatoes chopped
    • 1 tbsp heavy cream
    • 1/2 tbsp butter this salt the potatoes well but add additional salt to taste
    • 1 tbsp cheese I used mozzarella but its common to use parmesan
    • Seasoning : Garlic Sea Salt very intense flavor so it seasoned this dish extremely well. I used about 2 tsp for the meat and 1/2 tsp for potatoes. I am very much a season to taste, so I do not have exact spice measurements.

    Equipment

    • For your pan, I would recommend nothing bigger than 5′ x 6′
    • Food Scale For this recipe the use of a good scale will ensure accurate measurements!  The scale I used is linked here: https://amzn.to/3IvAh1d

    Method
     

    Boil the Potatoes:
    1. Chop your potatoes and add them to a pot of boiling water. Boil for about 7 minutes—you’ll know they’re ready when they’re very soft and a fork easily slides through.
    Prep the Veggies:
    1. While the potatoes boil, brunoise chop your carrots, white onion, and celery. Set those aside for later.
    Mash the Potatoes:
    1. Once the potatoes are done, remove from heat and drain the water. Mash them right in the pot until smooth, then mix in heavy cream, butter, and a little extra salt if needed. Set mashed potatoes aside in a bowl.
    Cook the Beef & Veggies:
    1. In a hot pan over medium heat, add your ground beef. Let it cook for about 30 seconds (just until it’s about medium-rare), then toss in your chopped veggies. Keep stirring and cook until the beef is fully cooked—this should take about 3-4 minutes.
    Finish the Filling & Assemble the Cottage Pie:
      Simmer the Sauce:
      1. In the same pan with your beef and veggies, stir in tomato paste, garlic paste, red wine, and veggie stock. Mix well and let it simmer for about 1 minute.
      2. (This is the perfect time to season to your taste! I added about 2 tsp of garlic salt.)
      Thicken the Filling:
      1. Sprinkle flour evenly over the top, mix again, and let the mixture simmer for another 30 seconds.
      2. (If it looks a little dry, just add 1 tbsp of veggie stock to loosen it up.)
      Add the Veggies:
      1. Toss in your corn and peas and bring everything to a final simmer for 1 more minute. Once everything’s heated through, remove from heat.
      Assemble & Bake:
        Preheat Oven:
        1. Set your oven to 350°F.
        2. Layer the Pie:
        3. In a personal-size baking dish (I used a Korean stone bowl!) add the entire beef mixture, gently pressing it down to flatten.
        4. Top with your mashed potato mixture, spreading it evenly to cover the filling.
        5. Use a fork to score the top in a criss-cross pattern for that classic shepherd’s pie look.
        6. Sprinkle shredded cheese evenly on top, and feel free to add another dash of seasoning.
        Bake:
        1. Place your dish on a flat baking pan (just in case of spills!) and bake for 35 minutes at 350°F.
        Garnish & Serve:
        1. Remove from oven and let it cool for about 5 minutes.
        2. Finish with fresh rosemary on top and enjoy!

        Notes

        Serving Suggestions:
        To truly elevate the dish, serve it on a dark-toned plate to highlight its vibrant colors! Finish it off with a garnish of fresh rosemary for an aromatic touch!
        This dish would pair excellent with a nice red wine!! The flavors are very rich and savory. It makes me feel like I am reading a nice book with candle lights, wine, and jazz music. A very cozy meal indeed.
        Additional Side dishes you could add: Toasted Artesian/ Baguette bread
        Thank you for reading!! Let me know if you have any questions or if you enjoyed the recipe!!